详解Springboot配置文件的使用
发布于 2018-03-24 03:26:18 | 567 次阅读 | 评论: 0 | 来源: 网友投递
Spring Boot
Spring Boot 项目旨在简化创建产品级的 Spring 应用和服务。你可通过它来选择不同的 Spring 平台。可创建独立的 Java 应用和 Web 应用,同时提供了命令行工具来允许 'spring scripts'.
在springboot项目中,也可以使用yml类型的配置文件代替properties文件。接下来通过本文给大家分享Springboot配置文件的使用,感兴趣的朋友一起看看吧
如果使用IDEA创建Springboot项目,默认会在resource目录下创建application.properties文件,在springboot项目中,也可以使用yml类型的配置文件代替properties文件
一、单个的获取配置文件中的内容
在字段上使用@Value("${配置文件中的key}")的方式获取单个的内容
1.在resource目录下创建application.yml文件,并添加一些配置,在yml文件中,key:后面需要添加一个空格,然后是value值,假设配置如下
#注意:在yml文件中添加value值时,value前面需要加一个空格
ip: 127.0.0.0
port: 8080
2.创建一个ConfigController类,获取配置文件中的内容并赋值给相应的字段
package com.example;
import org.springframework.beans.factory.annotation.Value;
import org.springframework.web.bind.annotation.RequestMapping;
import org.springframework.web.bind.annotation.RestController;
@RestController
public class ConfigController {
@Value("${ip}")//获取application.yml文件中名为ip的value值
private String ip;
@Value("${port}")//获取application.yml文件中名为port的value值,并且自动完成数据类型转换
private Integer port;
@RequestMapping("/config")
public String config() {
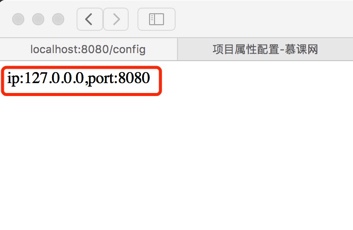
return "ip:"+ip+",port:"+port;
}
} 3.在SrpingbootdemoApplication中启动项目
package com.example;
import org.springframework.boot.SpringApplication;
import org.springframework.boot.autoconfigure.SpringBootApplication;
//入口
@SpringBootApplication
public class SpringbootdemoApplication {
 public static void main(String[] args) {
  SpringApplication.run(SpringbootdemoApplication.class, args);
 }
} 4.在浏览器中输入http://localhost:8080/config,可以看到输出了配置文件中配置的内容
二、使用Bean自动注入获取配置文件中的内容
假如配置文件中有很多内容,一个一个获取将会很麻烦,那么我们另外一种方式去获取配置文件中的信息
1.在配置文件中添加以下信息(注意格式),此处我们使用了一个名为devconfig的前缀
devconfig:
 ip: 127.0.0.0
 port: 8080
2.创建ConfigBean,在类中添加@Componet和@ConfigurationProperties注解,其中prefix设置为devconfig,将会获取yml中前缀为devconfig下的配置信息
package com.example;
 import org.springframework.boot.context.properties.ConfigurationProperties;
import org.springframework.stereotype.Component;
@Component
@ConfigurationProperties(prefix = "devconfig")//获取前缀为devconfig下的配置信息
public class ConfigBean {
 private String ip;//名字与配置文件中一致
 private Integer port;
 public String getIp() {
  return ip;
 }
 public void setIp(String ip) {
  this.ip = ip;
 }
 public Integer getPort() {
  return port;
 }
 public void setPort(Integer port) {
  this.port = port;
 }
}
3.在ConfigController中使用@Autowrite对bean自动注入,实例化bean
import org.springframework.beans.factory.annotation.Autowired;
import org.springframework.beans.factory.annotation.Value;
import org.springframework.web.bind.annotation.RequestMapping;
import org.springframework.web.bind.annotation.RestController;
@RestController
public class ConfigController {
// @Value("${ip}")//获取application.yml文件中名为ip的value值
// private String ip;
//
// @Value("${port}")//获取application.yml文件中名为port的value值,并且自动完成数据类型转换
// private Integer port;
//自动注入,实例化bean
@Autowired
private ConfigBean configBean;
@RequestMapping("/config")
public String config() {
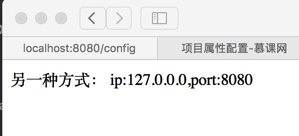
return "另一种方式: ip:"+configBean.getIp()+",port:"+configBean.getPort();
}
} 4.运行程序,输入http://localhost:8080/config进行测试
三、多个配置文件切换使用
1.假设开发环境使用ip为:127.0.0.0 使用端口为:8080
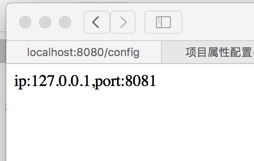
生产环境使用ip为:127.0.0.1 使用端口为:8081
下面来修改配置文件,在resource目录下创建一个名为application-dev.yml文件开发环境使用配置文件和application-produce.yml生产环境配置文件
application-dev.yml
config:
 ip: 127.0.0.0
 port: 8080
application-produce.yml
config:
 ip: 127.0.0.1
 port: 8081
application.yml中配置生效的配置文件,此处设为produce,也就是使用application-produce.yml文件
spring:
 profiles:
 active: produce
2.修改ConfigBean的prefix为config
package com.example;
import org.springframework.boot.context.properties.ConfigurationProperties;
import org.springframework.stereotype.Component;
@Component
@ConfigurationProperties(prefix = "config")
public class ConfigBean {
 private String ip;//名字与配置文件中一致
 private Integer port;
 public String getIp() {
  return ip;
 }
 public void setIp(String ip) {
  this.ip = ip;
 }
 public Integer getPort() {
  return port;
 }
 public void setPort(Integer port) {
  this.port = port;
 }
} 3.运行程序,在浏览器输入http://localhost:8080/config进行测试
4.也可通过启动jar包时添加参数来更改生效的配置文件,命令为
Java -jar XXX.jar --spring.profiles.active=poduce以上所述是小编给大家介绍的详解Springboot配置文件的使用,希望对大家有所帮助,如果大家有任何疑问请给我留言,小编会及时回复大家的。在此也非常感谢大家对PHPERZ网站的支持!