详解spring Boot 集成 Thymeleaf模板引擎实例
发布于 2018-03-16 05:24:41 | 222 次阅读 | 评论: 0 | 来源: 网友投递
Spring Boot
Spring Boot 项目旨在简化创建产品级的 Spring 应用和服务。你可通过它来选择不同的 Spring 平台。可创建独立的 Java 应用和 Web 应用,同时提供了命令行工具来允许 'spring scripts'.
本篇文章主要介绍了spring Boot 集成 Thymeleaf模板引擎实例,具有一定的参考价值,感兴趣的小伙伴们可以参考一下
今天学习了spring boot 集成Thymeleaf模板引擎。发现Thymeleaf功能确实很强大。记录于此,供自己以后使用。
Thymeleaf:
- Thymeleaf是一个java类库,他是一个xml/xhtml/html5的模板引擎,可以作为mvc的web应用的view层。
- Thymeleaf还提供了额外的模块与Spring MVC集成,所以我们可以使用Thymeleaf完全替代jsp。
spring Boot
- 通过org.springframework.boot.autoconfigure.thymeleaf包对Thymeleaf进行了自动配置。
- 通过ThymeleafAutoConfiguration类对集成所需要的bean进行自动配置。包括templateResolver,templateEngine,thymeleafViewResolver的配置。
下面我将演示spring boot 日常工作中常用的Thymeleaf用法。
Spring Boot 日常工作中常用Thymeleaf的用法
1:首先,在创建项目的时候选择依赖中选中Thymeleaf,或者在pom中添加依赖
<dependency>
<groupId>org.springframework.boot</groupId>
<artifactId>spring-boot-starter-thymeleaf</artifactId>
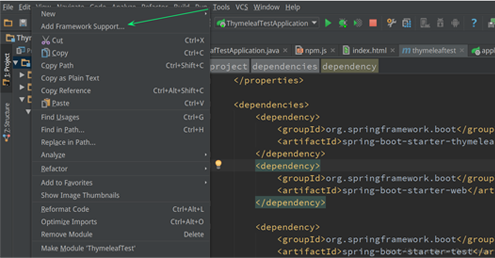
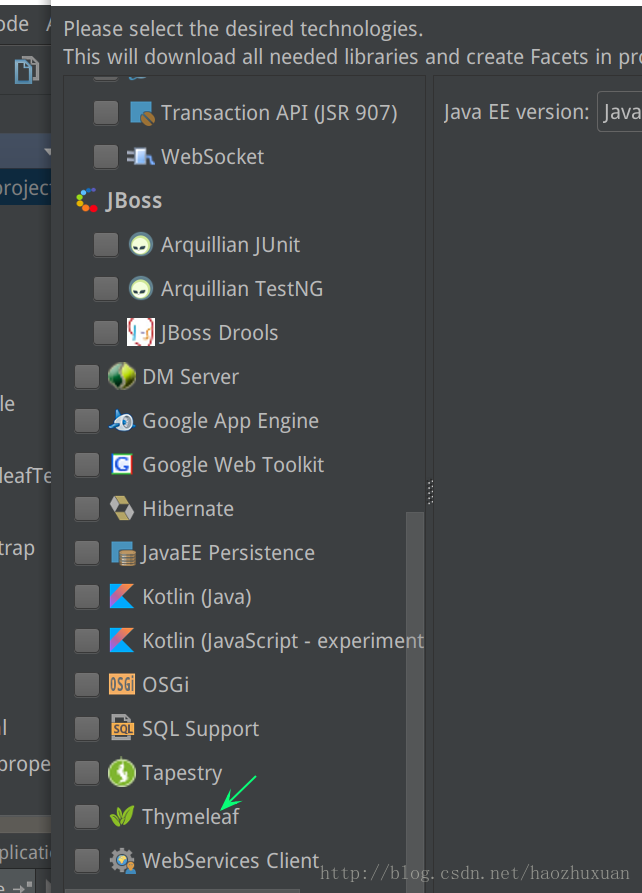
</dependency>或者项目名-右键-add Framework Support来添加依赖jar包。如图
2:示例javaBean
此类用来在模板页面展示数据用。包含name和age属性。
public class Person {
  private String name;
  private Integer age;

  public Person(String name, Integer age) {
    this.name = name;
    this.age = age;
  }

  public String getName() {
    return name;
  }

  public void setName(String name) {
    this.name = name;
  }

  public Integer getAge() {
    return age;
  }

  public void setAge(Integer age) {
    this.age = age;
  }
}
3.脚本样式静态文件
根据默认原则,脚本样式,图片等静态文件应放置在src/main/resources/static下,这里引入了Bootstrap和jQuery,结构如图所示:

4.演示页面
根据默认原则,页面应放置在src/main/resources/templates下。在src/main/resources/templates下面新建index.html,如上图。
代码如下:
<!DOCTYPE html>
<html xmlns:th="http://www.thymeleaf.org"
   xmlns:sec="http://www.thymeleaf.org/thymeleaf-extras-springsecurity3">
<head>
  <meta name="viewport" content="width=device-width,initial-scale=1"/>
  <link th:href="@{bootstrap/css/bootstrap.min.css}" rel="external nofollow" rel="stylesheet"/>
  <link th:href="@{bootstrap/css/bootstrap-theme.min.css}" rel="external nofollow" rel="stylesheet"/>
  <meta charset="UTF-8"/>
  <title>Title</title>
</head>
<body>
  <div class="panel panel-primary">
    <div class="panel-heading">
      <h3 class="panel-title">访问model</h3>
    </div>
    <div class="panel-body">
      <span th:text="${singlePerson.name}"></span>
    </div>
    <div th:if="${not #lists.isEmpty(people)}">
      <div class="panel panel-primary">
        <h3 class="panel-title">列表</h3>
      </div>
      <div class="panel-body">
        <ul class="panel-group">
          <li class="list-group-item" th:each="person:${people}">
            <span th:text="${person.name}"></span>
            <span th:text="${person.age}"></span>
            <button class="btn" th:onclick="'getName(\''+${person.name}+'\')'">获得名字</button>
          </li>
        </ul>
      </div>

    </div>
  </div>
<script th:src="@{jquery-1.10.2.min.js}" type="text/javascript"></script>
<script th:src="@{bootstrap/js/bootstrap.min.js}"></script>
<script th:inline="javascript">
  var single=[[${singlePerson}]];
  console.log(single.name+"/"+single.age);
  function getName(name) {

      console.log(name);

  }
</script>
</body>
</html>
5.数据准备
代码如下:
import org.springframework.boot.SpringApplication;
import org.springframework.boot.autoconfigure.SpringBootApplication;
import org.springframework.stereotype.Controller;
import org.springframework.ui.Model;
import org.springframework.web.bind.annotation.RequestMapping;
import org.springframework.web.bind.annotation.RestController;

import java.util.ArrayList;
import java.util.List;
@Controller
@SpringBootApplication
public class ThymeleafTestApplication {
  @RequestMapping("/")
  public String index(Model model){
    Person single=new Person("aa",1);
    List<Person> people=new ArrayList<Person>();
    Person p1=new Person("bb",2);
    Person p2=new Person("cc",3);
    Person p3=new Person("dd",4);
    people.add(p1);
    people.add(p2);
    people.add(p3);
    model.addAttribute("singlePerson",single);
    model.addAttribute("people",people);
    return "index";
  }
  public static void main(String[] args) {
    SpringApplication.run(ThymeleafTestApplication.class, args);
  }


}
6.运行
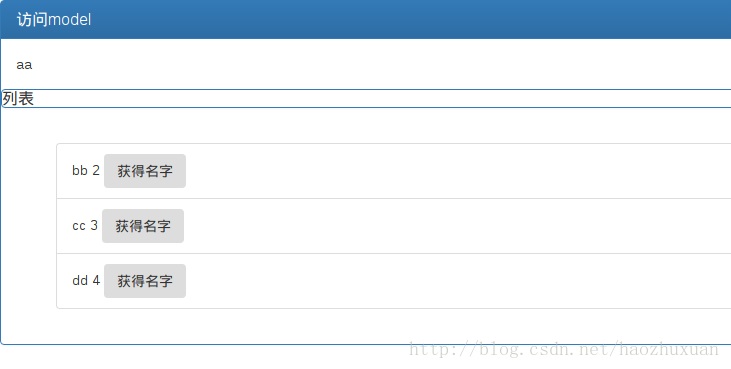
访问http://localhost:8080效果如图:
单击“获得名字” f12产看页面控制台打印的日志效果如图:

以上就是本文的全部内容,希望对大家的学习有所帮助,也希望大家多多支持PHPERZ。