spring task 定时任务实现示例
发布于 2017-11-27 07:25:44 | 135 次阅读 | 评论: 0 | 来源: 网友投递
Spring Framework 开源j2ee框架
Spring是什么呢?首先它是一个开源的项目,而且目前非常活跃;它是一个基于IOC和AOP的构架多层j2ee系统的框架,但它不强迫你必须在每一层 中必须使用Spring,因为它模块化的很好,允许你根据自己的需要选择使用它的某一个模块;它实现了很优雅的MVC,对不同的数据访问技术提供了统一的接口,采用IOC使得可以很容易的实现bean的装配,提供了简洁的AOP并据此实现Transcation Managment,等等
本篇文章主要介绍了spring task 定时任务实现示例,具有一定的参考价值,有兴趣的可以了解一下。
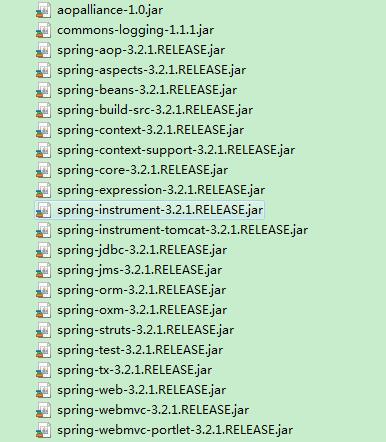
一、引入spring相关jar包:

二、在web.xml中配置spring
<listener>
  <description>Spring监听器</description>
  <listener-class>org.springframework.web.context.ContextLoaderListener</listener-class>
</listener>
<context-param>
  <param-name>contextConfigLocation</param-name>
  <param-value>classpath:applicationContext.xml</param-value>
</context-param>
三、在applicationContext.xml中配置监听器
<?xml version="1.0" encoding="UTF-8"?>
<beans xmlns="http://www.springframework.org/schema/beans"
  xmlns:xsi="http://www.w3.org/2001/XMLSchema-instance"
  xmlns:context="http://www.springframework.org/schema/context"
  xmlns:task="http://www.springframework.org/schema/task"
  xsi:schemaLocation="http://www.springframework.org/schema/beans
  http://www.springframework.org/schema/beans/spring-beans-3.0.xsd
  http://www.springframework.org/schema/context
  http://www.springframework.org/schema/context/spring-context-3.0.xsd
  http://www.springframework.org/schema/task
  http://www.springframework.org/schema/task/spring-task-3.0.xsd"
  default-lazy-init="false">

  <!-- 注解方式 -->
  <context:annotation-config />
  <context:component-scan base-package="com.test.task" />
  <task:annotation-driven/>

  <!-- XML方式 -->
  <!-- <bean name="testTask" class="com.test.task.TestTask" lazy-init="false"></bean>
  <task:scheduled-tasks>
    <task:scheduled ref="testTask" method="print" cron="0/5 * * * * ?"/>
  </task:scheduled-tasks> -->

</beans>
四、编写实体类
package com.test.task;

import java.text.DateFormat;
import java.util.Date;

import org.springframework.scheduling.annotation.Scheduled;
import org.springframework.stereotype.Component;

@Component
public class TestTask {
  @Scheduled(cron = "*/5 * * * * ?")
  public void print(){
    String time = DateFormat.getDateTimeInstance().format(new Date());
    System.out.println("定时器触发打印"+time);
  }
}
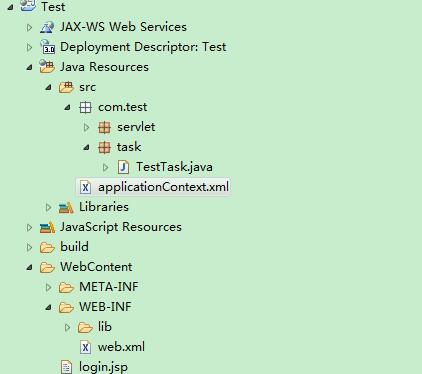
五、工程目录:

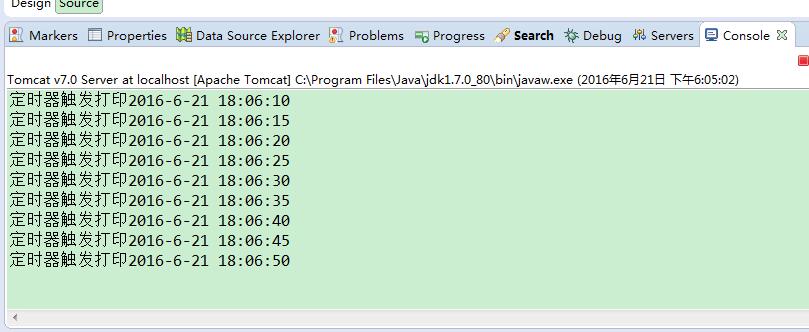
运行结果:

以上就是本文的全部内容,希望对大家的学习有所帮助,也希望大家多多支持PHPERZ。
推荐阅读
最新资讯