详解用Spring Boot零配置快速创建web项目
发布于 2017-11-26 09:27:53 | 173 次阅读 | 评论: 0 | 来源: 网友投递
Spring Framework 开源j2ee框架
Spring是什么呢?首先它是一个开源的项目,而且目前非常活跃;它是一个基于IOC和AOP的构架多层j2ee系统的框架,但它不强迫你必须在每一层 中必须使用Spring,因为它模块化的很好,允许你根据自己的需要选择使用它的某一个模块;它实现了很优雅的MVC,对不同的数据访问技术提供了统一的接口,采用IOC使得可以很容易的实现bean的装配,提供了简洁的AOP并据此实现Transcation Managment,等等
本篇文章主要介绍了详解用Spring Boot零配置快速创建web项目,具有一定的参考价值,感兴趣的小伙伴们可以参考一下。
一、Spring Boot简介
Spring Boot是由Pivotal团队提供的全新框架,其设计目的是用来简化新Spring应用的初始搭建以及开发过程。该框架使用了特定的方式来进行配置,从而使开发人员不再需要定义样板化的配置。通过这种方式,Boot致力于在蓬勃发展的快速应用开发领域(rapid application development)成为领导者。
本文是一个springboot入门级的helloworld程序。
二、maven安装与配置
下载地址:http://maven.apache.org/download.cgi
下载这个页面上Files下的apache-maven-3.3.9-bin.zip包
下载好后解压缩到本地,然后在环境变量中新建
M2_HOME=(目录)\apache-maven-3.3.9
在path中加入:%M2_HOME%/bin;
完了之后,把maven根目录下的conf目录下的settings.xml复制到C:\Users\(用户名)\.m2这个目录下,(这个目录是运行过mvn 相关命令后才有的,如果是第一次安装maven,可能这个目录没有,直接新建一个就好了)因为这个目录是eclipse和intellij等开发软件默认maven配置文件的地方
复制好了之后,修改settings.xml,主要修改两个地方:
<localRepository>D:/Program Files/maven/repository</localRepository>这儿是本地maven仓库的位置
<mirrors>
  <!-- mirror
   | Specifies a repository mirror site to use instead of a given repository. The repository that
   | this mirror serves has an ID that matches the mirrorOf element of this mirror. IDs are used
   | for inheritance and direct lookup purposes, and must be unique across the set of mirrors.
   |
  <mirror>
   <id>mirrorId</id>
   <mirrorOf>repositoryId</mirrorOf>
   <name>Human Readable Name for this Mirror.</name>
   <url>http://my.repository.com/repo/path</url>
  </mirror>
   -->

   <mirror>
   <id>alimaven</id>
   <name>aliyun maven</name>
   <url>http://maven.aliyun.com/nexus/content/groups/public/</url>
   <mirrorOf>central</mirrorOf>
  </mirror>
 </mirrors>
这个是国内的阿里云maven仓库的镜像,速度超级快,比国外默认的仓库快
强烈推荐哈!
三、用Spring Boot新建web项目
新建一个maven工程(注意,不要勾选create from archytype,虽然它会帮你创建骨架,但是会从外网下载一些东西,很慢,导致会卡在那,下载东西的时间,还不如手工创建一下目录,分分钟搞定)
然后输入相应的groupId,artifactId
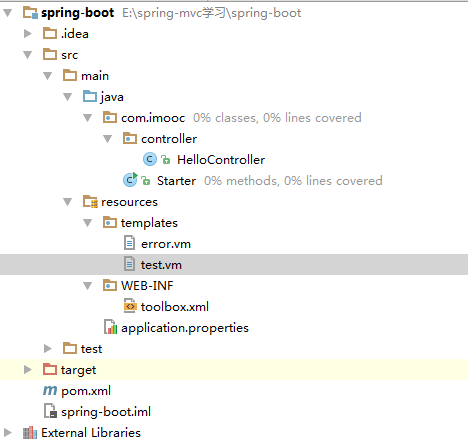
项目建好后,目录结构是这样的:
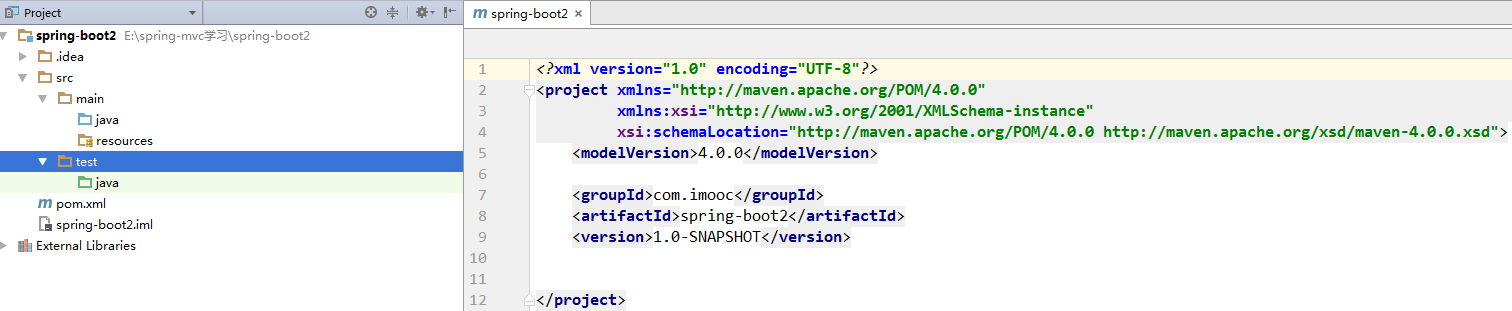
右边是pom.xml文件
在resources目录下创建WEB-INF目录,这个是web项目都该有的目录
在resources目录下创建templates目录,这个是velocity的vm模板放置的地方
好,接下来修改pom.xml,我直接贴一个最小配置
<?xml version="1.0" encoding="UTF-8"?>
<project xmlns="http://maven.apache.org/POM/4.0.0"
     xmlns:xsi="http://www.w3.org/2001/XMLSchema-instance"
     xsi:schemaLocation="http://maven.apache.org/POM/4.0.0 http://maven.apache.org/xsd/maven-4.0.0.xsd">
  <modelVersion>4.0.0</modelVersion>

  <groupId>com.imooc</groupId>
  <artifactId>spring-boot2</artifactId>
  <version>1.0-SNAPSHOT</version>

  <name>springboot</name>
  <url>http://maven.apache.org</url>

  <properties>
    <project.build.sourceEncoding>UTF-8</project.build.sourceEncoding>
  </properties>

  <parent>
    <groupId>org.springframework.boot</groupId>
    <artifactId>spring-boot-starter-parent</artifactId>
    <version>1.4.2.RELEASE</version>
  </parent>

  <dependencies>
    <dependency>
      <groupId>org.springframework.boot</groupId>
      <artifactId>spring-boot-starter-web</artifactId>
    </dependency>

    <dependency>
      <groupId>junit</groupId>
      <artifactId>junit</artifactId>
      <version>4.12</version>
    </dependency>

    <dependency>
      <groupId>org.springframework.boot</groupId>
      <artifactId>spring-boot-starter-velocity</artifactId>
    </dependency>
  </dependencies>
</project>
可以看到,继承了spring-boot-starter-parent,依赖了junit,spring-boot-starter-web,spring-boot-starter-velocity
以前我们在spring的配置,spring-boot都会按照默认配置,帮我们弄好
四、写代码
先写一个controller
package com.imooc.controller;

import org.springframework.stereotype.Controller;
import org.springframework.ui.ModelMap;
import org.springframework.web.bind.annotation.RequestMapping;

/**
 * HELLO 控制器
 */
@Controller
public class HelloController {

  @RequestMapping(value = "/test.htm")
  public String hello(ModelMap modelMap) {
    modelMap.addAttribute("message", "hello,world!");
    return "test";
  }
}
注意包名:com.imooc.controller
再写一个启动程序
package com.imooc;

import org.springframework.boot.SpringApplication;
import org.springframework.boot.autoconfigure.EnableAutoConfiguration;
import org.springframework.boot.autoconfigure.SpringBootApplication;

/**
 * 主程序开始
 */
@SpringBootApplication
public class Starter {

  public static void main(String[] args) {
    SpringApplication.run(Starter.class, args);
  }
}
注意启动程序的包名:com.imooc
注意上面配置的注解:SpringBootApplication
建议:带有main方法的类写在最外层的目录中,这样,spring-boot才能从最外层目录中,找到所有目录的配置
五、配置velocity
在resources下新建application.properties
spring.velocity.charset=UTF-8
spring.velocity.properties.input.encoding=UTF-8
spring.velocity.properties.output.encoding=UTF-8
spring.velocity.resourceLoaderPath=classpath:/templates/
spring.velocity.prefix=/
spring.velocity.suffix=.vm
spring.velocity.toolbox-config-location=/WEB-INF/toolbox.xm
在WEB-INF下新建toolbox.xml
<toolbox>
</toolbox>
空的就行了,只有一个根标签
好,下面新建一个vm,在templates下,新建一个test.vm
<h1>${message}</h1>好,最终的目录结构是:
六、启动
run main函数
浏览器中输入:localhost:8080/test.htm
就可以看到hello,world了,是不是so easy,免去了很多麻烦的配置呢
以上就是本文的全部内容,希望对大家的学习有所帮助,也希望大家多多支持PHPERZ。