Android编程仿Iphone拖动相片特效Gallery的简单应用示例
发布于 2017-09-30 03:16:39 | 158 次阅读 | 评论: 0 | 来源: 网友投递
Android移动端操作系统
Android是一种基于Linux的自由及开放源代码的操作系统,主要使用于移动设备,如智能手机和平板电脑,由Google公司和开放手机联盟领导及开发。尚未有统一中文名称,中国大陆地区较多人使用“安卓”或“安致”。
这篇文章主要介绍了Android编程仿Iphone拖动相片特效Gallery的简单应用,结合实例形式分析了Android图形拖动特效的实现步骤与相关操作技巧,需要的朋友可以参考下
本文实例讲述了Android编程仿Iphone拖动相片特效Gallery的简单应用。分享给大家供大家参考,具体如下:
Step 1:准备图片素材.
将icon2,icon3,icon4,icon5,icon6五张图片导入res/drawable里加上icon.png本身一共有6张图片.
Step 2:新建Android工程,命名为GalleryDemo.
Step 3:设计UI,修改main.xml代码如下:
<?xml version="1.0" encoding="utf-8"?>
<LinearLayout
 xmlns:android="http://schemas.android.com/apk/res/android"
 android:background="@drawable/white"
 android:orientation="vertical"
 android:layout_width="fill_parent"
 android:layout_height="fill_parent"
 >
 <TextView
 android:id="@+id/myTextView01"
 android:layout_width="fill_parent"
 android:layout_height="wrap_content"
 android:text="@string/hello"
 android:gravity="center_vertical|center_horizontal"
 />
 <Gallery
 android:id="@+id/myGallery1"
 android:layout_width="fill_parent"
 android:layout_height="wrap_content"
 android:gravity="bottom"
 />
</LinearLayout>
Step 4:设计主程序类GalleryDemo.Java代码如下:
package com.android.test;
import com.android.test.R.drawable;
import android.app.Activity;
import android.content.Context;
import android.os.Bundle;
import android.view.View;
import android.view.ViewGroup;
import android.widget.BaseAdapter;
import android.widget.Gallery;
import android.widget.ImageView;
public class GalleryDemo extends Activity {
 /** Called when the activity is first created. */
 @Override
 public void onCreate(Bundle savedInstanceState) {
 super.onCreate(savedInstanceState);
 setContentView(R.layout.main);
 ((Gallery) findViewById(R.id.myGallery1)).setAdapter(new ImageAdapter(
  this));
 }
 public class ImageAdapter extends BaseAdapter {
 /* 类成员 myContext为Context父类 */
 private Context myContext;
 /* 使用res/drawable图片作为图片来源 */
 private int[] myImageIds = { drawable.icon, drawable.icon2,
  drawable.icon3, drawable.icon4, drawable.icon5, drawable.icon6};
 /* 构造器只有一个参数,即要存储的Context */
 public ImageAdapter(Context c) {
  this.myContext = c;
 }
 /* 返回所有已定义的图片总数量 */
 public int getCount() {
  return this.myImageIds.length;
 }
 /* 利用getItem方法,取得目前容器中图像的数组ID */
 public Object getItem(int position) {
  return position;
 }
 public long getItemId(int position) {
  return position;
 }
 /* 取得目前欲显示的图像View,传入数组ID值使之读取与成像 */
 public View getView(int position, View convertView, ViewGroup parent) {
  /* 创建一个ImageView对象 */
  ImageView i = new ImageView(this.myContext);
  i.setImageResource(this.myImageIds[position]);
  i.setScaleType(ImageView.ScaleType.FIT_XY);
  /* 设置这个ImageView对象的宽高,单位为dip */
  i.setLayoutParams(new Gallery.LayoutParams(120, 120));
  return i;
 }
 /* 依据距离中央的位移量 利用getScale返回views的大小(0.0f to 1.0f) */
 public float getScale(boolean focused, int offset) {
  /* Formula: 1 / (2 ^ offset) */
  return Math.max(0, 1.0f / (float) Math.pow(2, Math.abs(offset)));
 }
 }
}
Step 5:run it,效果如下图:
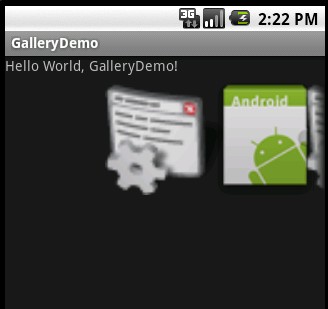
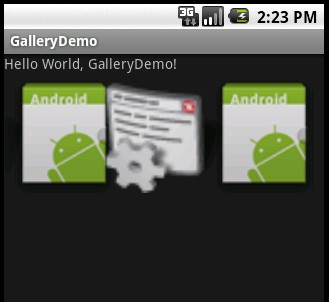
注明:该代码基本参照Android SDK开发范例代码大全
希望本文所述对大家Android程序设计有所帮助。
推荐阅读
最新资讯