AngularJS中的包含详细介绍及实现示例
发布于 2017-03-29 08:57:31 | 341 次阅读 | 评论: 0 | 来源: 网友投递
这里有新鲜出炉的AngularJS开发指南,程序狗速度看过来!
AngularJS 前端JS框架
AngularJS诞生于Google是一款优秀的前端JS框架,已经被用于Google的多款产品当中。AngularJS有着诸多特性,最为核心的是:MVC、模块化、自动化双向数据绑定、语义化标签、依赖注入,等等。
本文主要介绍AngularJS 包含,这里对相关资料做了详细整理,并附代码实例和效果图,有需要的朋友可以看一下
AngularJS 包含
在 AngularJS 中,你可以在 HTML 中包含 HTML 文件。
在 HTML 中包含 HTML 文件
在 HTML 中,目前还不支持包含 HTML 文件的功能。
服务端包含
大多服务端脚本都支持包含文件功能 (SSI: Server Side Includes)。
使用 SSI, 你可在 HTML 中包含 HTML 文件,并发送到客户端浏览器。
PHP 实例
<?php require("navigation.php"); ?>
客户端包含
通过 JavaScript 有很多种方式可以在 HTML 中包含 HTML 文件。
通常我们使用 http 请求 (AJAX) 从服务端获取数据,返回的数据我们可以通过 使用 innerHTML 写入到 HTML 元素中。
AngularJS 包含
使用 AngularJS, 你可以使用 ng-include 指令来包含 HTML 内容:
实例
<body>

<div class="container">
 <div ng-include="'myUsers_List.htm'"></div>
 <div ng-include="'myUsers_Form.htm'"></div>
</div>
步骤如下:
步骤 1: 创建 HTML 列表
myUsers_List.html
<h1>用户</h1>

<table class="table table-striped">
 <thead><tr>
 <th>编辑</th>
 <th>名</th>
 <th>姓</th>
 </tr></thead>
 <tbody><tr ng-repeat="user in users">
 <td>
  <button class="btn" ng-click="editUser(user.id)">
  <span class="glyphicon glyphicon-pencil"></span>  Edit
  </button>
 </td>
 <td>{{ user.fName }}</td>
 <td>{{ user.lName }}</td>
 </tr></tbody>
</table>
运行结果:
用户
| 编辑 | 名 | 姓 |
|---|---|---|
| {{ user.fName }} | {{ user.lName }} |
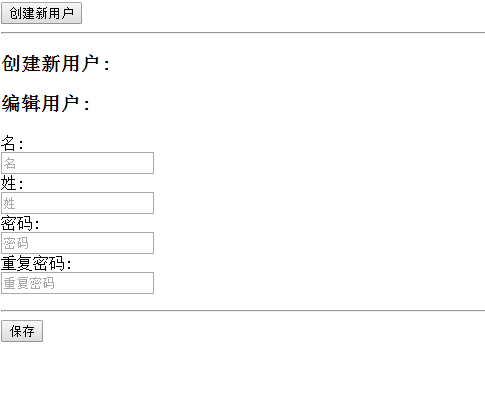
步骤 2: 创建 HTML 表单
myUsers_Form.html
<button class="btn btn-success" ng-click="editUser('new')">
<span class="glyphicon glyphicon-user"></span>创建新用户
</button>
<hr>

<h3 ng-show="edit">创建新用户:</h3>
<h3 ng-hide="edit">编辑用户:</h3>

<form class="form-horizontal">
 <div class="form-group">
 <label class="col-sm-2 control-label">名:</label>
 <div class="col-sm-10">
 <input type="text" ng-model="fName" ng-disabled="!edit" placeholder="名">
 </div>
 </div>
 <div class="form-group">
 <label class="col-sm-2 control-label">姓:</label>
 <div class="col-sm-10">
 <input type="text" ng-model="lName" ng-disabled="!edit" placeholder="姓">
 </div>
 </div>
 <div class="form-group">
 <label class="col-sm-2 control-label">密码:</label>
 <div class="col-sm-10">
 <input type="password" ng-model="passw1" placeholder="密码">
 </div>
 </div>
 <div class="form-group">
 <label class="col-sm-2 control-label">重复密码:</label>
 <div class="col-sm-10">
 <input type="password" ng-model="passw2" placeholder="重复密码">
 </div>
 </div>
</form>

<hr>
<button class="btn btn-success" ng-disabled="error || incomplete">
<span class="glyphicon glyphicon-save"></span>保存
</button>
运行结果:
步骤 3: 创建控制器
myUsers.js
angular.module('myApp', []).controller('userCtrl', function($scope) {
$scope.fName = '';
$scope.lName = '';
$scope.passw1 = '';
$scope.passw2 = '';
$scope.users = [
{id:1, fName:'Hege',lName:"Pege" },
{id:2, fName:'Kim',lName:"Pim" },
{id:3, fName:'Sal',lName:"Smith" },
{id:4, fName:'Jack',lName:"Jones" },
{id:5, fName:'John',lName:"Doe" },
{id:6, fName:'Peter',lName:"Pan" }
];
$scope.edit = true;
$scope.error = false;
$scope.incomplete = false;
$scope.editUser = function(id) {
if (id == 'new') {
$scope.edit = true;
$scope.incomplete = true;
$scope.fName = '';
$scope.lName = '';
} else {
$scope.edit = false;
$scope.fName = $scope.users[id-1].fName;
$scope.lName = $scope.users[id-1].lName;
}
};
$scope.$watch('passw1',function() {$scope.test();});
$scope.$watch('passw2',function() {$scope.test();});
$scope.$watch('fName',function() {$scope.test();});
$scope.$watch('lName',function() {$scope.test();});
$scope.test = function() {
if ($scope.passw1 !== $scope.passw2) {
$scope.error = true;
} else {
$scope.error = false;
}
$scope.incomplete = false;
if ($scope.edit && (!$scope.fName.length ||
!$scope.lName.length ||
!$scope.passw1.length || !$scope.passw2.length)) {
$scope.incomplete = true;
}
};
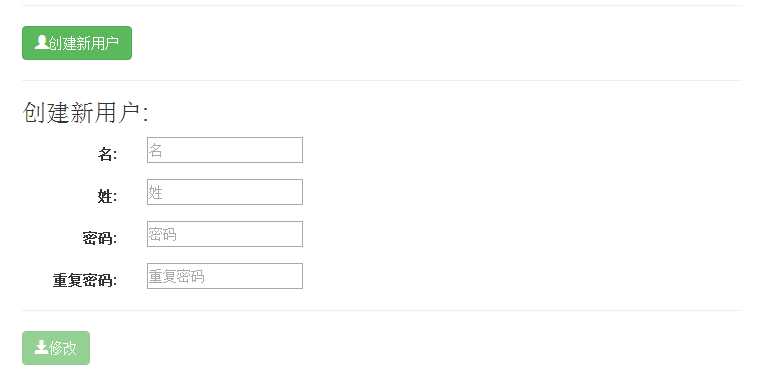
})步骤 4: 创建主页
myUsers.html
<!DOCTYPE html>
<html>
<head>
<meta charset="utf-8">
<link rel="stylesheet" href="//apps.bdimg.com/libs/bootstrap/3.3.4/css/bootstrap.min.css">
<script src="http://apps.bdimg.com/libs/angular.js/1.4.6/angular.min.js"></script>
</head>
<body ng-app="myApp" ng-controller="userCtrl">

<div class="container">
 <div ng-include="'myUsers_List.htm'"></div>
 <div ng-include="'myUsers_Form.htm'"></div>
</div>

<script src= "myUsers.js"></script>

</body>
</html>
运行结果:

以上就是 对AngularJS 包含资料的整理,希望能帮助AngularJS 编程的朋友。