在VMware 10.0上安装NetBSD 1.0
发布于 2016-10-23 09:18:46 | 103 次阅读 | 评论: 0 | 来源: 网友投递
NetBSD UNIX-like操作系统
NetBSD是一个免费的,具有高度移植性的 UNIX-like 操作系统,是现行可移植平台最多的操作系统,可以在许多平台上执行,从 64bit alpha 服务器到手持设备和嵌入式设备。NetBSD计划的口号是:"Of course it runs NetBSD"。它设计简洁,代码规范,拥有众多先进特性,使得它在业界和学术界广受好评。由于简洁的设计和先进的特征,使得它在生产和研究方面,都有卓越的表现,而且它也有受使用者支持的完整的源代码。许多程序都可以很容易地通过NetBSD Packages Collection获得。
最近开始系统的学习计算机网络,买了被奉为经典中的经典《TCP/IP详解 卷2:实现》。不过这本书确实也有点过时了,讲解的是4.4BSD-Lite的代码,和当前BSD发布版的代码已经有很大差异了。根据在网络上搜索的结果,FreeBSD-2.0、NetBSD-1.0和BSD/OS 2.0都是基于4.4BSD-Lite的,但是BSD/OS在当时是商业版,现在也没有找到这个版本的源代码。FreeBSD的i386架构的源码,最接近的只有2.0.5版本的,2.0的不知道是没有,还是已经丢失了。比较了FreeBSD-2.0.5、NetBSD-1.0的代码和4.4BSD-Lite代码的差异,FreeBSD的已经差异很大,NetBSD的则几乎没有差异!所以最后决定安装NetBSD-1.0版本的系统。安装的目的当然是为了能对系统的代码进行修改并测试,只是看代码而不能修改多没意思啊^_^.
折腾了好几天,最后终于是安装成功并且内核的重编和更新也没有问题了。简单记录下经过千辛万苦得出来的步骤:
1.最开始直接用1.0版本的kcaha-10.fs/kcbt-10.fs进行安装,但是这两个安装映像死活找不到内核文件netbsd,查看过1.0的内核代码,估计问题是出在打开软盘和读写软盘的部分,不过内核代码没法编译,在1.3版本的系统里编译也没通过,最后只能无奈放弃这个安装方式了。
2.开始的时候1.0版本的没法安装成功,所以就下载了往后的版本,最后确定1.3版本是最接近可以正确启动安装程序的版本。但是比对1.3版本的代码和1.0的代码后,发现1.3版本的网络代码部分也已经改动了不少了,对查看源代码不是很方便。尝试过在1.3版本的系统下直接将内核文件netbsd换成1.0版本的,不过最后系统没法正常启动。在1.3版本的系统下编译1.0版本的内核代码,也不是很顺利。不过对1.3版本的安装过程中,发现安装程序只是将编译好的应用和内核文件直接解压到硬盘上,然后做一些配置工作,之后就可以重启并从硬盘引导安装好的系统了。所以想到使用1.3版本的安装程序,将1.0版本的系统解压到硬盘上,应该可以将1.0版本的系统安装成功。首次尝试这个方法的时候,重启之后从硬盘引导1.0版本的系统时,root文件系统居然变成只读的,其他文件系统/usr、/var和/home都没有mount成功。当时以为这个方法行不通,接着尝试了其他的方式,也都没有成功,最后又回到了这个方式上来,不过糊里糊涂的解决了文件系统挂载的问题后,一下子所有问题都迎刃而解了。
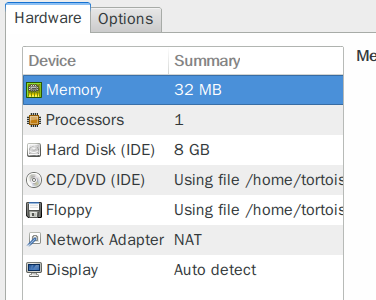
3.首先创建一个虚拟机,需要带有软盘和光盘,软盘用于存放安装程序,光盘存放编译好的应用和内核。当然,硬盘是必须要有的...
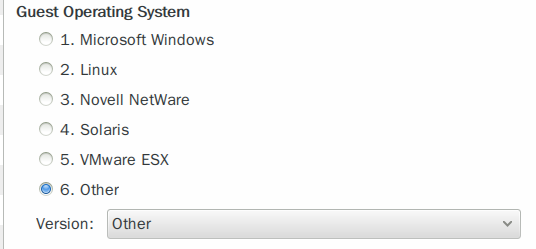
系统类型选择“Other”:
软盘使用的镜像文件就是NetBSD-1.3的启动镜像文件boot.fs:
[tortoise@sea floppies]$ pwd
/home/tortoise/Downloads/NetBSD-1.3/i386/installation/floppies
[tortoise@sea floppies]$ bximage
========================================================================
                                bximage
                  Disk Image Creation Tool for Bochs
          $Id: bximage.c 11315 2012-08-05 18:13:38Z vruppert $
========================================================================

Do you want to create a floppy disk image or a hard disk image?
Please type hd or fd. [hd] fd

Choose the size of floppy disk image to create, in megabytes.
Please type 0.16, 0.18, 0.32, 0.36, 0.72, 1.2, 1.44, 1.68, 1.72, or 2.88.
 [1.44]         -- 这里直接回车
I will create a floppy image with
  cyl=80
  heads=2
  sectors per track=18
  total sectors=2880
  total bytes=1474560

What should I name the image?
[a.img] boot.img

Writing: [] Done.

I wrote 1474560 bytes to boot.img.

The following line should appear in your bochsrc:
  floppya: image="boot.img", status=inserted
[tortoise@sea floppies]$ dd if=boot.fs of=boot.img
2880+0 records in
2880+0 records out
1474560 bytes (1.5 MB) copied, 0.0233093 s, 63.3 MB/s
[tortoise@sea floppies]$
光盘镜像文件包含的文件列表如下:
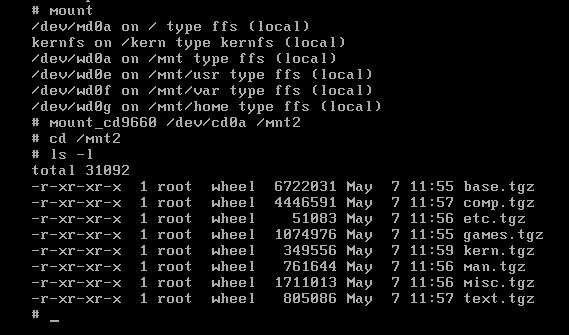
[root@sea bin]# ls -l /mnt/cd
total 15550
-r-xr-xr-x. 1 root root 6722031 May  7 19:55 base.tgz
-r-xr-xr-x. 1 root root 4446591 May  7 19:57 comp.tgz
-r-xr-xr-x. 1 root root   51083 May  7 19:56 etc.tgz
-r-xr-xr-x. 1 root root 1074976 May  7 19:55 games.tgz
-r-xr-xr-x. 1 root root  349556 May  7 19:59 kern.tgz
-r-xr-xr-x. 1 root root  761644 May  7 19:56 man.tgz
-r-xr-xr-x. 1 root root 1711013 May  7 19:56 misc.tgz
-r-xr-xr-x. 1 root root  805086 May  7 19:57 text.tgz
[root@sea bin]#
除了kern.tgz外,其他的每个文件都对应NetBSD-1.0/i386/binary下的一个目录,文件生成方式如下(以base.tgz文件为例,其他文件类似):
[tortoise@sea base10]$ pwd
/home/tortoise/Downloads/NetBSD-1.0/i386/binary/base10
[tortoise@sea base10]$ cat base10.* > base.tgz
[tortoise@sea base10]$ tar -tzvf base.tgz | head
drwxr-xr-x root/wheel        0 1994-10-20 03:27 .
drwxr-xr-x root/wheel        0 1994-10-20 03:03 ./altroot
drwxr-xr-x root/wheel        0 1994-10-20 03:10 ./bin
-r-xr-xr-x bin/bin       40960 1994-10-20 03:10 ./bin/[
-r-xr-xr-x bin/bin       40960 1994-10-20 03:08 ./bin/cat
-r-xr-xr-x bin/bin       45056 1994-10-20 03:08 ./bin/chmod
-r-xr-xr-x bin/bin       45056 1994-10-20 03:09 ./bin/cp
-r-xr-xr-x bin/bin      200704 1994-10-20 03:09 ./bin/csh
-r-xr-xr-x bin/bin       57344 1994-10-20 03:09 ./bin/date
-r-xr-xr-x bin/bin       45056 1994-10-20 03:09 ./bin/dd
[tortoise@sea base10]$
kern.tgz文件是从NetBSD-1.0的启动镜像文件kcaha-10.fs(kcbt-10.fs应该也可以,不过我没试过这个文件)里把netbsd文件抽取出来打包压缩生成的:
[tortoise@sea floppies]$ pwd
/home/tortoise/Downloads/NetBSD-1.0/i386/floppies
[tortoise@sea floppies]$ bximage
========================================================================
                                bximage
                  Disk Image Creation Tool for Bochs
          $Id: bximage.c 11315 2012-08-05 18:13:38Z vruppert $
========================================================================

Do you want to create a floppy disk image or a hard disk image?
Please type hd or fd. [hd] fd

Choose the size of floppy disk image to create, in megabytes.
Please type 0.16, 0.18, 0.32, 0.36, 0.72, 1.2, 1.44, 1.68, 1.72, or 2.88.
 [1.44] 1.2
I will create a floppy image with
  cyl=80
  heads=2
  sectors per track=15
  total sectors=2400
  total bytes=1228800

What should I name the image?
[a.img]

Writing: [] Done.

I wrote 1228800 bytes to a.img.

The following line should appear in your bochsrc:
  floppya: image="a.img", status=inserted
[tortoise@sea floppies]$ dd if=kcaha-10.fs of=a.img
2400+0 records in
2400+0 records out
1228800 bytes (1.2 MB) copied, 0.0181592 s, 67.7 MB/s
[tortoise@sea floppies]$ sudo mount -o loop -r a.img /mnt/floppy
[tortoise@sea floppies]$ ls -l /mnt/floppy/
total 659
drwxr-xr-x. 2 root root    512 Oct 24  1994 bin
-rwxr-xr-x. 1 root root   2005 Oct 24  1994 copy_kernel
drwxr-xr-x. 2 root root   2560 Oct 24  1994 dev
drwxr-xr-x. 2 root root    512 Oct 24  1994 mnt
-rwxr-xr-x. 1 root root 659600 Oct 24  1994 netbsd
drwxr-xr-x. 2 root root    512 Oct 24  1994 sbin
drwxr-xr-x. 3 root root    512 Oct 24  1994 usr
[tortoise@sea floppies]$ cp /mnt/floppy/netbsd ./
[tortoise@sea floppies]$ tar -cvf kern.tar ./netbsd
./netbsd
[tortoise@sea floppies]$ gzip kern.tar
[tortoise@sea floppies]$ mv kern.tar.gz kern.tgz
[tortoise@sea floppies]$ tar -tzvf kern.tgz
-rwxr-xr-x tortoise/tortoise 659600 2014-05-14 23:12 ./netbsd
[tortoise@sea floppies]$
8个tgz文件都创建好之后,放在同一个目录下生成iso镜像文件:
[tortoise@sea bin]$ ls -l
total 31468
-rw-rw-r--. 1 tortoise tortoise  6722031 May  7 19:55 base.tgz
-rw-rw-r--. 1 tortoise tortoise  4446591 May  7 19:57 comp.tgz
-rw-rw-r--. 1 tortoise tortoise    51083 May  7 19:56 etc.tgz
-rw-rw-r--. 1 tortoise tortoise  1074976 May  7 19:55 games.tgz
-rw-rw-r--. 1 tortoise tortoise   349556 May  7 19:59 kern.tgz
-rw-rw-r--. 1 tortoise tortoise   761644 May  7 19:56 man.tgz
-rw-rw-r--. 1 tortoise tortoise  1711013 May  7 19:56 misc.tgz
-rw-rw-r--. 1 tortoise tortoise   805086 May  7 19:57 text.tgz
[tortoise@sea bin]$ mkisofs -o NetBSD-1.0-bin.iso *.tgz
I: -input-charset not specified, using utf-8 (detected in locale settings)
 62.91% done, estimate finish Wed May 14 23:19:53 2014
Total translation table size: 0
Total rockridge attributes bytes: 0
Total directory bytes: 0
Path table size(bytes): 10
Max brk space used 0
7952 extents written (15 MB)
[tortoise@sea bin]$
打包压缩成tgz文件格式,是为了符合NetBSD-1.3版本的安装文件格式要求。
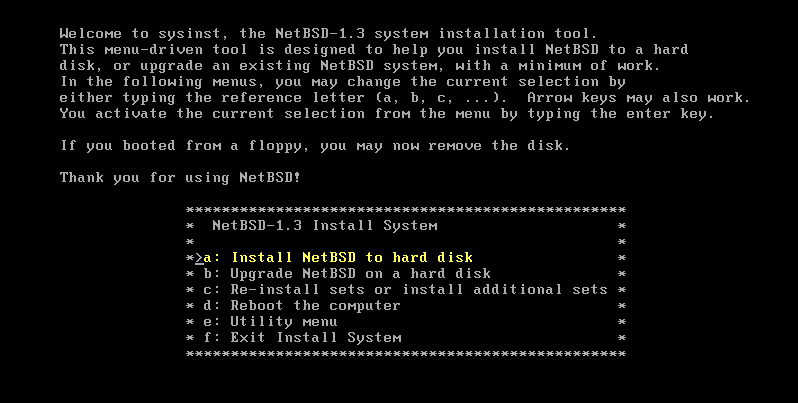
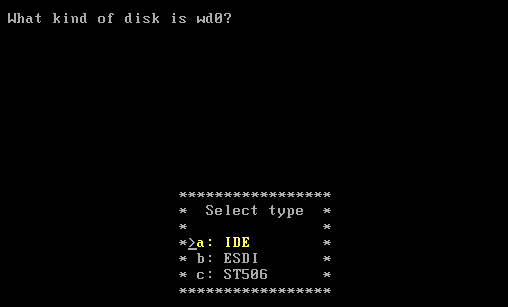
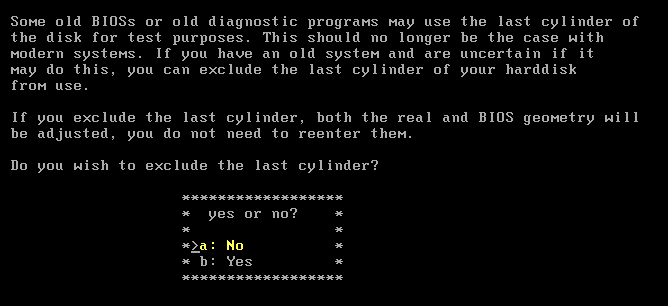
4.启动虚拟机,开始安装过程:


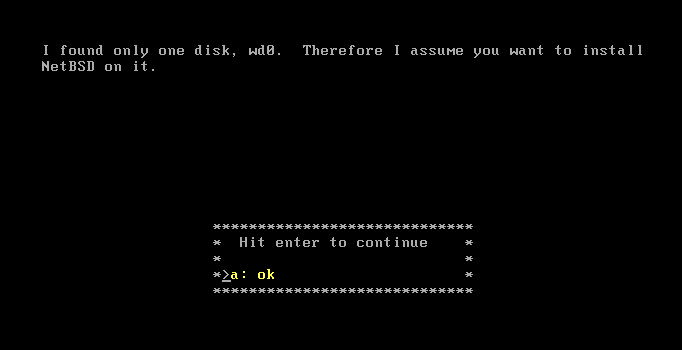

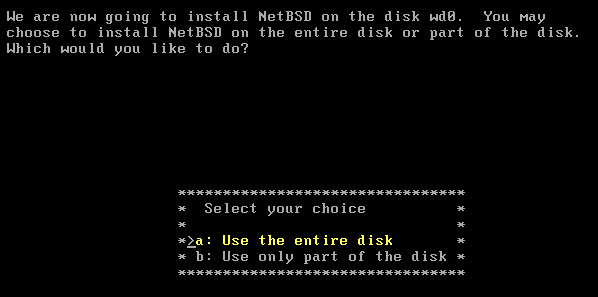

自定义硬盘的分区方式,

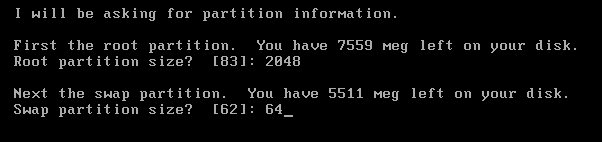
根分区使用2G空间,交换分区使用64M,为内存的两倍,
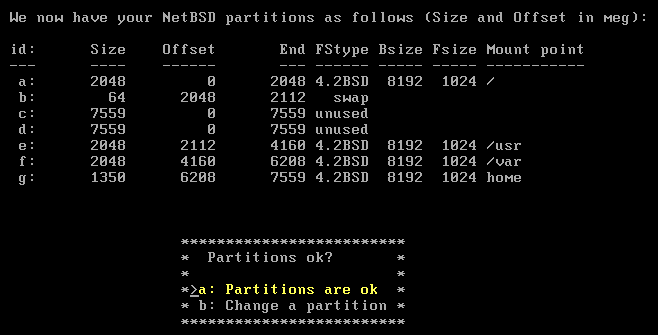
根据硬盘的容量进行分区安排就可以了,


回车之后就真正格式化硬盘了,

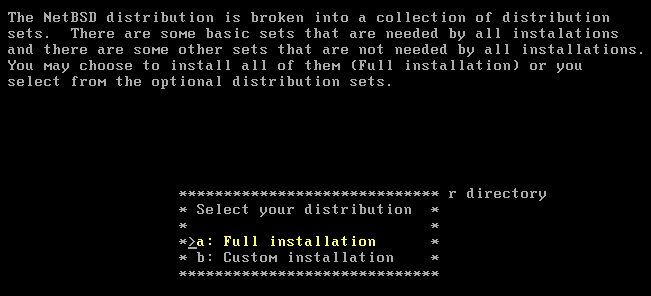
按回车后即进入软件包安转界面,选者cdrom安装方式,
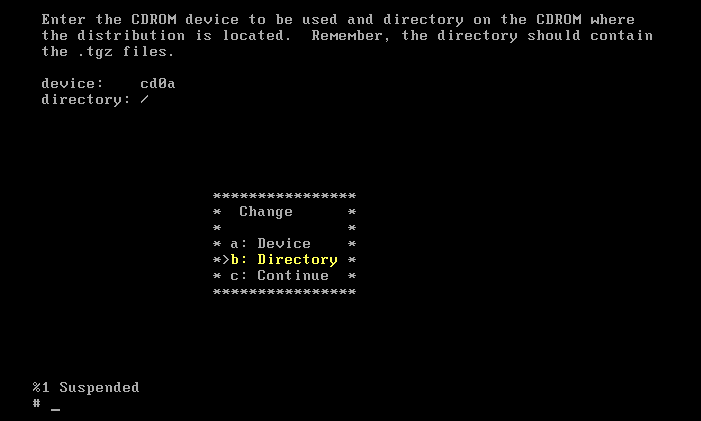
按Ctrl-Z退出安装进程,查看当前已挂载的设备,将光盘挂载到系统上(不挂载的话会一直找不到文件):
进入挂载的目录之后再使用fg命令回到安装进程,这里如果不cd进入光盘的挂载目录的话,好像会有问题,懒得去确认了,哈哈:

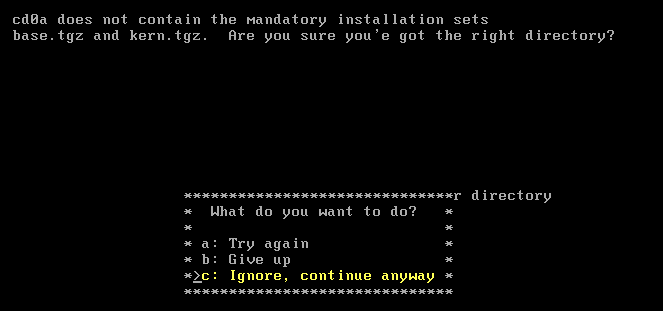
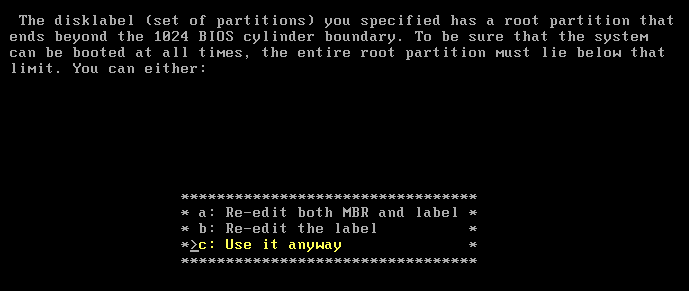
忽略报错信息,继续:
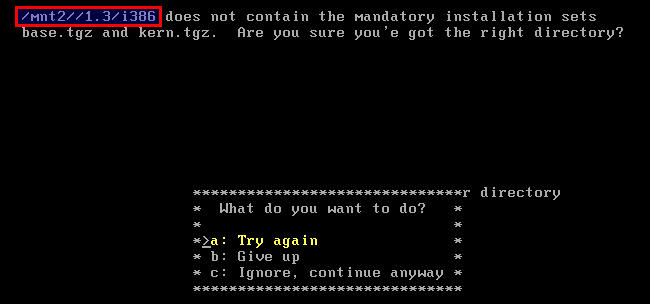
文件路径和之前输入的不一样的,要不是强制加上的,要不就是有bug了,修改路径后继续:
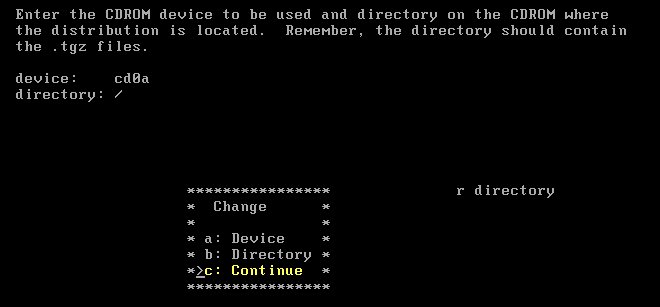

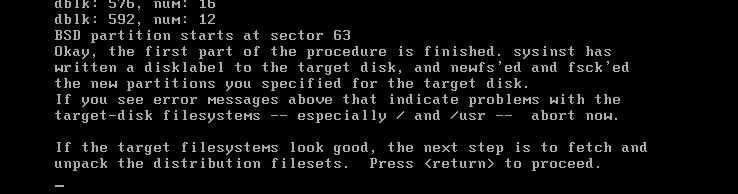
再次忽略报错信息,继续往下:
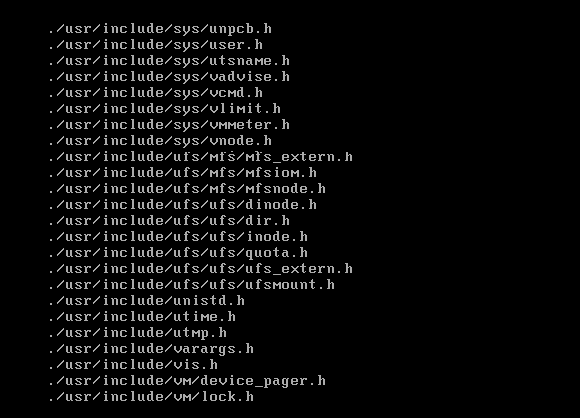
回车之后就会将cdrom中的文件解压到硬盘上,
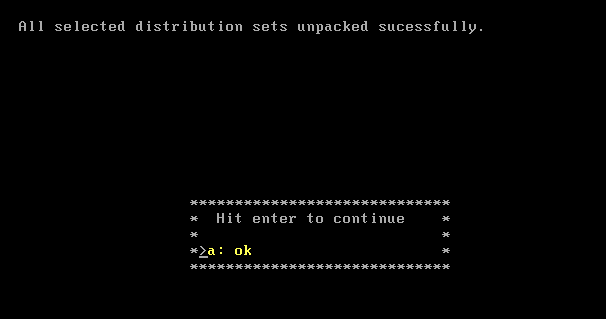
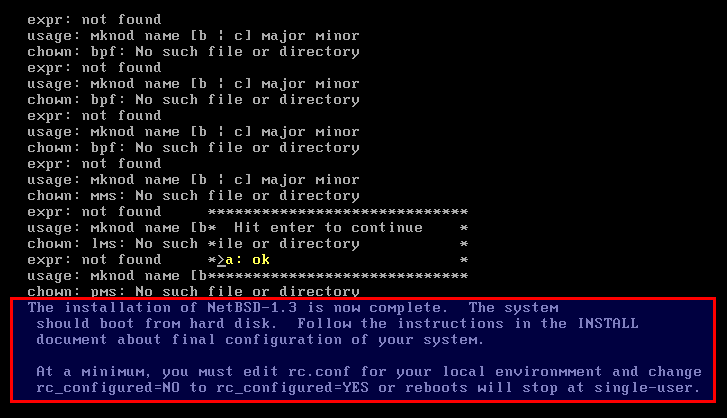
输出信息有点乱,直接回车:
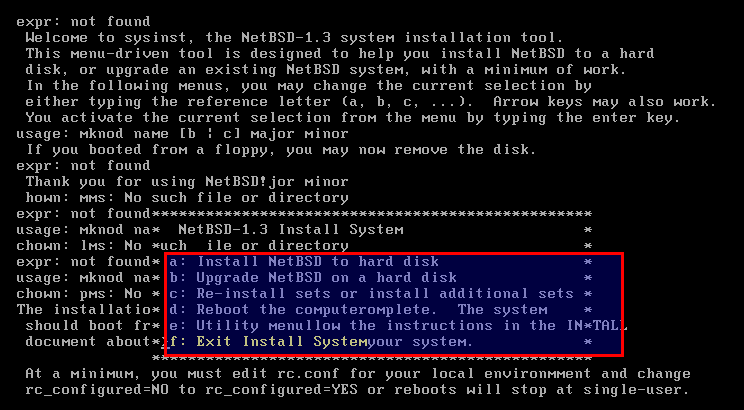
回到最开始的安装界面了,这里可以直接退出了。
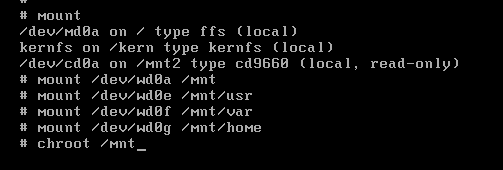
把硬盘的分区都挂载到系统上,然后使用chroot命令跳转到/mnt目录下:
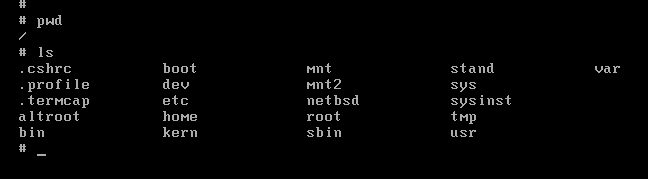
跳转成功,进入/etc目录下用 vi 修改 rc 文件:

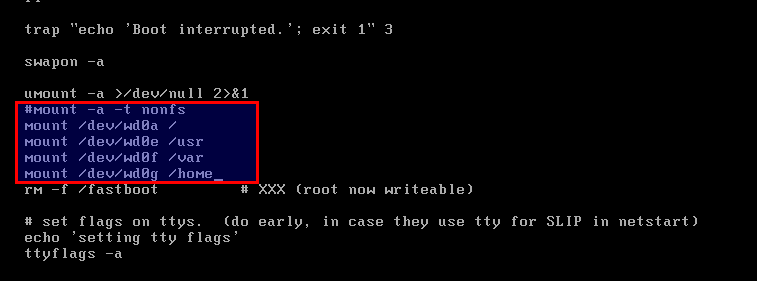
红色方框内的就是需要修改的地方。按照实际的分区输入分区挂载的命令,保存之后退出vi。
先断开软盘的连接,再reboot重启系统:
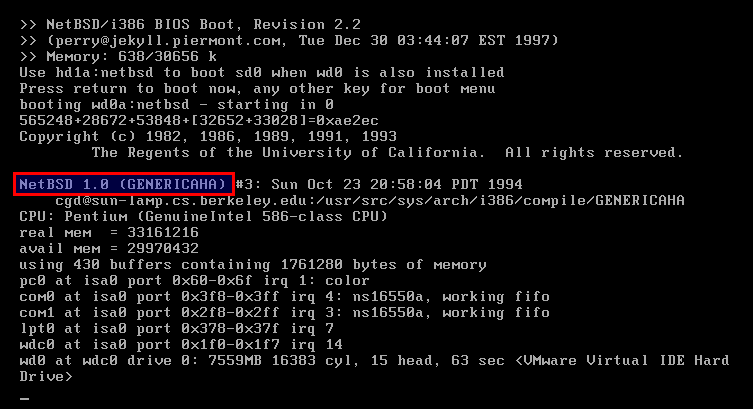
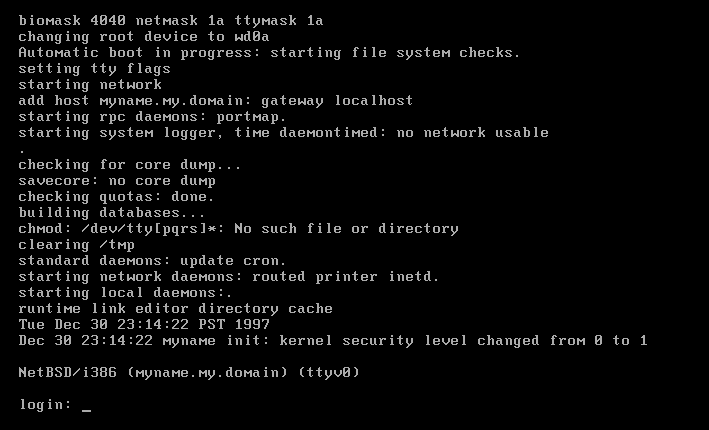
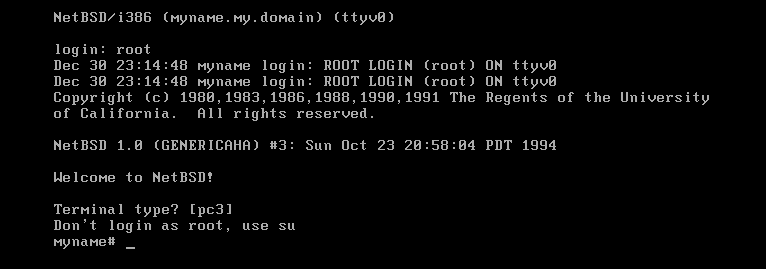
NetBSD-1.0 登录成功!