Android控件ImageSwitcher实现左右图片切换功能
发布于 2016-06-30 02:57:03 | 205 次阅读 | 评论: 0 | 来源: 网友投递
Android移动端操作系统
Android是一种基于Linux的自由及开放源代码的操作系统,主要使用于移动设备,如智能手机和平板电脑,由Google公司和开放手机联盟领导及开发。尚未有统一中文名称,中国大陆地区较多人使用“安卓”或“安致”。
这篇文章主要为大家详细介绍了Android控件ImageSwitcher实现左右图片切换功能,具有一定的参考价值,感兴趣的小伙伴们可以参考一下
ImageSwitcher类是ViewSwitcher类的子类,它实现的效果是在完成ImageView的切换并且带有动画效果。要使用这个类需要以下两个步骤:
1)为ImageSwitcher类提供一个ViewFactory,该ViewFactory生成的View组件必须是ImageView。
2)需要切换的时候,只需要嗲用ImageSwitcher的setImageDrawable()、setImageResource()、setImageURL()方法即可实现切换。
activity_main.xml:
<LinearLayout xmlns:android="http://schemas.android.com/apk/res/android"
  xmlns:tools="http://schemas.android.com/tools"
  android:layout_width="match_parent"
  android:layout_height="match_parent"
  android:orientation="vertical"
  tools:context=".MainActivity" >

  <ImageSwitcher
    android:id="@+id/imageswitcher"
    android:layout_width="200dp"
    android:layout_height="200dp"
    android:layout_gravity="center_horizontal" />

  <RelativeLayout
    android:layout_width="match_parent"
    android:layout_height="match_parent"
    android:orientation="horizontal" >

    <Button
      android:id="@+id/back"
      android:layout_width="wrap_content"
      android:layout_height="wrap_content"
      android:layout_alignParentLeft="true"
      android:text="back" />

    <Button
      android:id="@+id/forward"
      android:layout_width="wrap_content"
      android:layout_height="wrap_content"
      android:layout_alignParentRight="true"
      android:text="forward" />
  </RelativeLayout>

</LinearLayout>
Main_activity.java:
package com.example.android_imageswitcher1;

import android.app.Activity;
import android.os.Bundle;
import android.view.View;
import android.view.View.OnClickListener;
import android.widget.Button;
import android.widget.ImageSwitcher;
import android.widget.ImageView;
import android.widget.ViewSwitcher.ViewFactory;

public class MainActivity extends Activity implements ViewFactory,
    OnClickListener {

  ImageSwitcher mImageSwitcher = null;
  Button btn1, btn2;
  int index = 0;
  int[] resId = new int[9];

  @Override
  protected void onCreate(Bundle savedInstanceState) {
    super.onCreate(savedInstanceState);
    setContentView(R.layout.activity_main);
    mImageSwitcher = (ImageSwitcher) this.findViewById(R.id.imageswitcher);
    btn1 = (Button) this.findViewById(R.id.back);
    btn2 = (Button) this.findViewById(R.id.forward);
    btn1.setOnClickListener(this);
    btn2.setOnClickListener(this);
    mImageSwitcher.setFactory(this);
    mImageSwitcher.setInAnimation(this, android.R.anim.slide_in_left);
    mImageSwitcher.setOutAnimation(this, android.R.anim.slide_out_right);
    initResources();
    if (resId.length > 0) {
      mImageSwitcher.setImageResource(resId[0]);
    }
  }

  public void initResources() {
    resId[0] = R.drawable.adobe;
    resId[1] = R.drawable.android;
    resId[2] = R.drawable.circle;
    resId[3] = R.drawable.digg;
    resId[4] = R.drawable.flower;
    resId[5] = R.drawable.gmail;
    resId[6] = R.drawable.imdb;
    resId[7] = R.drawable.photo;
    resId[8] = R.drawable.point;
  }

  @Override
  public View makeView() {
    return new ImageView(MainActivity.this);
  }

  @Override
  public void onClick(View view) {
    int action = view.getId();
    switch (action) {
    case R.id.back:
      index--;
      if (index < 0) {
        index = resId.length - 1;
      }
      mImageSwitcher.setImageResource(resId[index]);
      break;
    case R.id.forward:
      index++;
      if (index > resId.length - 1) {
        index = 0;
      }
      mImageSwitcher.setImageResource(resId[index]);
      break;
    default:
      break;
    }

  }

}
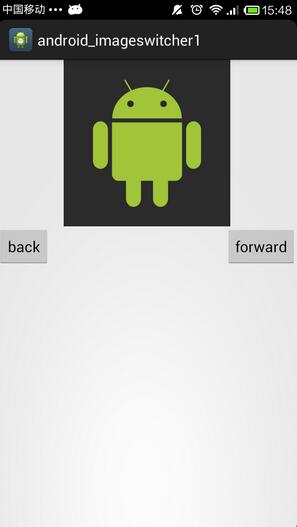
实现的效果如下:
以上就是本文的全部内容,希望对大家学习Android软件编程有所帮助。
推荐阅读
最新资讯